Disclaimer
For Non-Engineers: The goal of this blog is to be layman-friendly so any feedback about anything confusing or unclear is valuable and appreciated. Currently working on a way to allow those without a Github account to provide feedback at the end of the article.
For Engineers: This is still a subject I am actively learning about so feel free to leave a comment with corrections or suggestions if you have any.
God Rays
While thinking about graphical improvements to The Far Reaches, I landed on the decision to invest some time into environmental weather effects like rain, snow, clouds, etc. I was deeply inspired by t3ssel8r’s video on god rays (and much of his other stuff) and decided to take a crack at it myself. In this post I will go over some existing implementations of this effect and in my next post I will document my progress as I attempt to recreate the effect myself.
Before we begin let’s break this down to understand what we’re talking about here. You’ve seen these before likely both in real life and in video games.
Caption
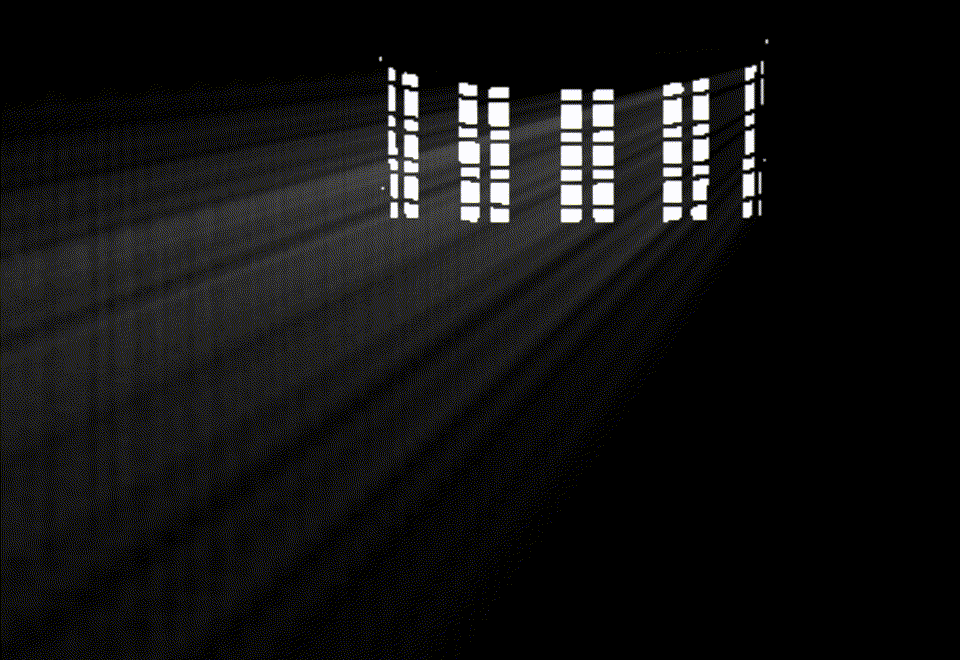
“God Rays”
The scientific term for this phenomenon is called crepuscular rays. Crepuscular meaning “of or related to twilight” referring to the fact that this effect usually occurs during twilight. In the graphics world the term is volumetric light scattering, referring to how the light “scatters” in the atmosphere.
These effects are caused by clouds or other objects and give the impression of “shafts” of light emitting from the sun. Essentially the shadows from the clouds create shadowed and un-shadowed regions of the atmosphere where light is being scattered and the contrast between these regions gives the effect of “shafts” of light emerging from the sun.
Approaches
Between researching online and discussing the topic with a friend in the game development field, I’ve identified two possible approaches to rendering god rays. I’ll quickly go over each of these approaches in layman’s term to the best of my ability.
Composited Radial Blur
The radial blur method is a great opportunity to talk about a common practice that some of you artists out there maybe be familiar with called compositing. It’s a fairly straight-forward concept where artists take several images and using various forms of blending, combine them together to create impressive effects.
Many effects in graphics are achieved the same way where instead of compositing still images, you composite each frame using its framebuffers (which is just a term for the section of memory on your computer that a given frame is stored on).
The approach seen here by Github user math-araujo achieves their god ray effect by compositing several images together. So let’s talk through each one.
Occlusion Map
Caption
Occlusion Map (Source)
The occlusion map is an image that tells us which pixels are being directly lit and which pixels are being indirectly lit. The lighter regions of the screen show us where light sources are directly pointed at our camera and the dark regions show us where light is being unobserved or blocked.
Default Scene
Caption
Default Scene (Source)
This is just the scene rendered normally. When rendering the scene as normal something called a Shadow Map is generated which is another image that just tells us what part of our scene is in shadow and what is illuminated. This will come in handy later when we want to composite our final image.
Important
It’s important to note the distinction between the purpose of the shadow and occlusion map. The shadow map tells us where shadows are while the occlusion map tells us what is blocking the light sources.
Radial Blur
Caption
Radial Blur (Source)
This next image is generated from our Occlusion Map using a method outlined in this Nvidia article. It uses an effect called radial blur which given a point on the screen just blurs an image outward from that point.
This method is a type of effect called Post-Processing (sometimes called PostFX) which is a fancy way of saying any kind of process or operation that is done on a frame of our video game after all the objects have been drawn to it and before we display it to our screen. This is also sometimes referred to as a screen-space effect which is a reference to the Coordinate Space the effect is performed within.
During this post-process we use ray-casting to find points along a path from each pixel of our screen to the pixel of our light source. Ray-casting in this context just refers to the process of drawing a line called a ray from a point called its origin in a given direction. In this case, the ray’s origin is the pixel we want to process and the direction is towards the light source.
We then stop along this ray multiple times and take a sample of the screen at the given point. We take these samples and combine them using the scary-looking equation below which is Nvidia’s way of approximating light scattering. The resulting color is then just stored back in the pixel we were originally looking at.
Caption
Light Scattering Approximation Function
Composited Result
Okay so let’s recap what images are available for us to composite together:
- The Default Scene which contains the scene as would be without god rays
- The Shadow Map of our light which tells us where the shadows are
- The Radial Blur which contains our god rays
There are several ways to blend these images together but to keep the explanation simple we effectively use the shadow map to decide which parts of our radial blur we want to apply to our image (we don’t want god rays to appear in shadowed areas). Then we take the result of that and “lighten” our default scene and BAM we have our god rays.
Caption
Radial Blur (Source)
Quad-based Approximation
While the approach using a radial blur is quite effective it has drawback of only creating god rays when the camera is pointed at a light source. While this is how it works in real life, the camera will never be pointed at the sun in The Far Reaches since the game is from a top-down isometric view.
This is the approach used in t3ssel8r’s video and documented here by Cyanilux who shares Unity-based implementation.
Caption
Cyanilux’s Implementation (Source)
I will quickly go over the process here as this is likely the approach I will go with in my next post.
Quads
Okay so what’s a quad? Well it’s just a rectangle but in three-dimensional space but with some finagling it can become a ray from the heavens.
The first step is to place our quads in our scene where we would like the rays to be and set them to act as billboards. This means the quad will always face the camera regardless of how the camera moves. Then we use a vertex shader to stretch the upper parts of the quad towards our light source. This creates the effect of a quadrilateral shape stretching from its base towards the sun.
Then it’s just a matter of shading the rays the color you want them, applying some noise and modulating the opacity of the rays based off of several factors including:
- How far the quads are from the camera. We want rays close to the camera to fade away as to not interfere with our view of the scene.
- If the quads are intersecting with objects in the scene. We want rays that intersect geometry to be transparent where they intersect with geometry.
- If the quads are in shadows. We don’t want rays to appear in shadows.
If the above seems like I’m glossing over some things, that’s because I will be going much further in-depth next time when I attempt this myself.
Conclusion
Congratulations! Now you know a little bit about how your favorite video game makes all those pretty sunbeams. Please leave a comment down below if you have any feedback, questions or just want to say hi! Next time we’ll start talking more about the Quad-based Approximation approach and my attempt at implementing something similar.